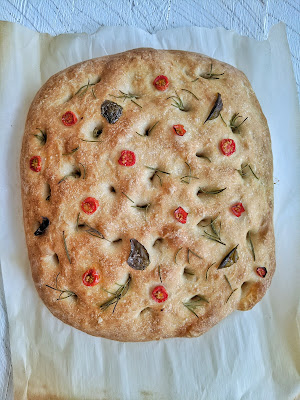
During the first days of quarantine, I was obsessively watching bake-along videos on Instagram. One of the Instagram accounts that I have diligently watched is Bread Ahead. They are a London Bakery and are famous for their doughnuts. I visited the bakery a few years ago and had one of those delicious doughnuts. I learned how to make them in a Zoom class recently too! The owner Matthew demonstrates how to make many of the items they sell in their shop on his Instagram account. I saved all the videos and have made quite a few of the recipes. One of the recipes I tried and fell in love with was the Focaccia. I have a great big rosemary plant in my garden and it's fun to snip some off for this bread. The recipe is special because it's a no-knead version. Instead of kneading, you fold the dough. Matthew shows his special folding technique on Instagram. I tried to describe it in words in the recipe, but I recommend watching him. Here is the link to Bread Ahead's original recipe and video on Instagram. The main change I made is that I use instant yeast instead of fresh yeast (you can't really find fresh here in the grocery store) and because I changed it to dry, the initial rise time is a little longer. I have also converted the recipe to standard American measurements.
 Focaccia
adapted from Bread Ahead Bakery
4 1/2 cups flour
1 tsp dry instant yeast
2 1/4 cups warm water
2 tsps salt
1/4 cup olive oil, divided
Rosemary, washed and stems removed
Sea Salt
1. Measure out water into a medium sized bowl. Sprinkle yeast on top. Let it sit for a couple minutes to hydrate, then stir together. Set aside.
2. In a large bowl, add salt and flour. Stir together. Make a well in the center and add water and yeast mixture. Stir to combine scraping down the sides of the bowl. Mix well until dough comes together.
3. Pour 2 TBSPs of olive oil around the edge of the dough where it meets the sides of the bowl. Scrape sides down so the the oil gets under the dough.
4. Prepare an area to dump out and fold dough with a little bit of olive oil so it doesn't stick. Dump dough into the surface. Maneuver dough into a square with your fingers (about 10 inches across). This is where we fold (FOLD #1). Watch this fold in action in the video link above at about 15:30 in. Grab one end of the dough and fold it across about 2/3 of the way over. Then grab the other end (straight across from the first end you grabbed) and pull it up and over toward the other side. Now you have a skinny rectangle. Take the skinny end and repeat the same fold (2/3 of the way over, then take the last side and and pull it over. Carefully flip the dough over and slide it back into the bowl. Cover and leave at room temperature for 1 hour.
6. After 1 hour, carefully slide the dough onto your prepared folding surface and repeat the above folding process (FOLD #2). Slide back into bowl. Cover and leave a room temp to rise for 30 minutes.
7. After the 30 minutes is up, repeat folding process (FOLD #3). Cover and leave on counter for another 20-30 minutes as you prepare for the next steps.
8. Preheat the oven to 450 degrees. Line a baking sheet with parchment paper. Sprinkle a little flour or corn meal on the baking sheet. Slide dough onto baking sheet. Pull the sides a little to stretch out.
9. Drizzle about 1 TBSP of olive oil on top. Poke holes into the dough with your fingertips stretching dough out a little as you poke the holes. Stick small pieces of rosemary on top. Drizzle with another 1 TBSP of olive oil.
10. If you have a spray bottle, spray the top of the dough lightly with water (this will help to form a crust) and sprinkle with sea salt.
11. Bake for 17 minutes or until top is lightly browned.
Makes one loaf
For 2 smaller round loaves: In step 8, line two 8-inch round pans with parchment paper instead of using a baking sheet. Cut dough in half and slide one half of the dough into each pan. Follow other directions as stated. Drizzle 1/2 TBSP of oil on each loaf, and decorate with rosemary (add cherry tomato slices for Christmas design). Bake as directed above for 15-17min, checking at 15 min.
For 2 round loaves: In step 8, line two 8-inch round pans with parchment paper instead of using a baking sheet. Cut dough in half and slide one half of dough into each pan.


.jpg)


