CSS

Friday, May 16, 2025

Cheeseburger Sliders

 It's been awhile! I haven't been trying too many new things lately. Now that my family is getting older and I only have two kids at home, I'm not making as many big dinners, and most of what I make is quick and easy. But when I find a recipe that I keep going back to, I have to add it to the blog just to make it easier for myself to find again. This is one of those recipes. 

Cheeseburger Sliders
adapted from Natasha'sKitchen.com
1 lb. lean ground beef
1/4 TBSP olive oil
1/2 tsp salt
1/2 tsp pepper
1/2 tsp garlic powder
1/4 large yellow onion, finely diced
2 TBSPs mayo
6 oz medium cheddar, shredded (can also use slices)
1 pkg of 12 Hawaiian rolls
1 TBSP unsalted butter, melted, plus more to grease baking sheet
1 tsp sesame seeds
Pickle slices

1. Preheat oven to 350˚F. Butter the bottom of a rimmed baking sheet.
2. In a large skillet over medium/high heat add olive oil. Add diced onion then ground beef and break up with a spatula. Season with salt, pepper, and garlic powder. Cook over medium/high heat until beef is browned, then remove from heat. Tilt skillet to spoon off and discard excess fat. Stir in mayo.
3. Cut buns in half. Place bottom half of rolls on buttered baking sheet. Spread ground beef mixture evenly over the rolls. Cover the ground beef with 6 oz of shredded cheddar.
4. Place the top of buns, cut-side down, over the burgers. Brush tops with melted butter and immediately sprinkle tops with sesame seeds. Bake at 350˚F for 12-15 minutes, or until cheese is melted and tops are golden brown. Serve with pickle slices.

Tuesday, November 15, 2022

Chocolate Pecan Pie

This pie is a staple at our family Thanksgiving dinners every year. It's on an old recipe card and I'm not sure where it came from. The recipe says you can use Baker's brand German's Sweet Chocolate or Semi-Sweet. It also calls for pecan halves. I don't like to use pecan halves in pies. I prefer pieces because halves are harder to cut through, and I just like them smaller. You can use a store-bought crust or whip up one of your own like this.

Chocolate Pecan Pie
Mom
1 package (4oz) semi-sweet baking chocolate, broken into pieces
2 TBSPs butter or margarine
1/3 cup sugar
1 cup light corn syrup
3 eggs, slightly beaten
1 tsp vanilla
1 1/4 cups pecan pieces
1 unbaked 9-inch pie crust

1. Preheat oven to 350.
2. Microwave chocolate and butter (or margarine) in a microwave-safe bowl on high power for 1-2 minutes or until butter is melted, stirring halfway through. Stir until the chocolate is completely melted.
3. Stir in sugar, corn syrup, eggs, and vanilla until well blended. Stir in pecans. Pour into crust.
4. Bake for 50-60 minutes or until the filling is firm 2 inches from the edge. Cool on a wire rack.
Makes 8 servings. 


Tuesday, May 17, 2022

Coconut Cream Pie

This pie is so good! One of my favorites! I've adapted the original recipe to my liking by omitting shredded coconut from the filling. I don't like to chew my creamy custard filling, but if that is your thing, you can add up to 1 cup of sweetened shredded coconut when you add the butter and extracts. This pie is a little time-consuming to make, but so worth it! It's best to plan ahead and make this in stages. I make my pie dough, roll it out, put it in the pie pan, and refrigerate it overnight. I also toast my coconut the day before. The next morning, I blind bake it and let it cool. Then I make the filling in the early afternoon and put the pie in the refrigerator to make sure it has plenty of time to cool before dessert time. While it's chilling, I make the whipped cream. Go ahead and give it a try! You won't regret it!

Coconut Cream Pie
Pie
1 COLD unbaked pie crust in a pie pan
4 large egg yolks
1/4 cup cornstarch
1 (14 ounce) can of coconut milk
1 cup half and half
2/3 cup sugar
1/4 tsp salt
2 TBSPs unsalted butter, softened
1 tsp vanilla extract
1/2 tsp coconut extract
Topping
1/4 cup sweetened shredded coconut for garnish
1 cup heavy whipping cream
1/4 cup powdered sugar
1/2 tsp coconut extract


1. Blind bake your crust: You need to start with a cold crust to prevent it from shrinking in the oven. If your crust isn't cold, refrigerate for 30 min before continuing. Preheat oven to 375°F. Carefully line the pie dough with parchment paper, then add some pie weights or dried beans on top of the parchment paper to weigh it down.  Bake until the edges are starting to brown 15-16 min. Remove pie crust from the oven and carefully lift the parchment paper (with the weights) off of the crust. Prick holes all around the bottom crust with a fork. Return the pie crust to the oven and bake for 15 more minutes. Cool pie crust completely. You can do this up to 3 days ahead of time. Cover cooled crust tightly and refrigerate until ready to fill.
2. Make the coconut filling: Whisk the egg yolks and cornstarch together. Set aside. Whisk the coconut milk, half-and-half, granulated sugar, and salt together in a medium saucepan over medium heat. Whisking occasionally, bring to a boil. Boil for 2 minutes, then reduce temperature to medium-low heat. Once boiling, remove about 1/2 cup of the mixture and, in a slow and steady stream, whisk into the egg yolk and cornstarch mixture. Keep those egg yolks moving so they don’t scramble. In a slow and steady stream, pour and whisk the egg yolk mixture into the pot. The pudding will immediately begin to bubble and thicken. Whisk and cook for 1 minute and 30 seconds. Remove from heat and stir in the butter, vanilla, and coconut extract. Pour warm filling into cooled pie crust. Cover tightly with plastic wrap directly on the surface of the pudding (to prevent a skin from forming) and refrigerate for at least 3 hours or overnight until chilled and thickened. Pie may be refrigerated for up to 1 day.
3. Toast the coconut: Preheat oven to 350°F. Spread the 1/4 cup of shredded coconut onto a small baking sheet. Bake for about 10 minutes until golden. 
4. For the whipped cream: Using a hand mixer or a stand mixer fitted with a whisk attachment, whip the heavy cream, powdered sugar, and coconut extract on medium-high speed until peaks form, about 3-4 minutes.
5. Pipe or spread the whipped cream on top. Garnish with toasted coconut. Chill the pie uncovered for up to a few hours or you can serve it immediately. Cover leftovers and store in the refrigerator for up to 5 days.

Saturday, October 30, 2021

Candied Jalapeño Cornbread

My mom and sisters and I are all pretty good cooks. We are also slightly competitive. I needed a winning cornbread recipe to enter into our church chili and cornbread cook-off, so that I could keep up with them and their wins this year. I had the idea to add candied jalapeños! I found a recipe that was full of the good stuff, corn, cheese, and it called for store bought pickled sweet jalapeños. I substituted candied jalapeños that I made myself and I won! Here's the result.

Candied Jalapeño Cornbread
adapted from saladinajar.com
Candied Jalapeños
1/2 pound jalapeño peppers
1 cup sugar
1/3 cup apple cider vinegar
1/2 tsp turmeric powder
1/2 tsp ground ginger 

Cornbread
1/4 cup melted unsalted butter, divided
1 cup yellow cornmeal
1 cup flour
1 tsp baking powder
1/2 tsp baking soda
3/4 tsp salt
1/3 cup brown sugar
2 TBSPs vegetable oil
2 eggs
3/4 cup whole milk
1/3 cup plain Greek yogurt
1/2 cup fresh corn kernels, cut off the cob
1/3 cup candied jalapeños
2.5 ounces shredded Cheddar cheese

1. Remove and discard stems from jalapeño peppers, then slice into 1/4" slices. If you want less heat, remove the veins and seeds. I left mine in. Set pepper slices aside.
2. In a medium saucepan, add 1 cup sugar, vinegar, turmeric, and ginger. Bring to a boil.
3. Reduce heat to about medium-low and simmer for 5 minutes. Raise the heat to about medium-high to bring mixture back to a boil. Once boiling, add the pepper slices. Allow to return to a boil, then reduce the heat again to medium-low and simmer for 4 minutes.
4. Turn off heat a let cool in pan as you prepare the cornbread batter.
5. Preheat oven to 350 degrees. Line 9 inch round cake pan with parchment paper. Pour 1 TBSP of melted butter onto parchment paper in pan and spread around, set aside remaining butter.
6. In a large bowl, whisk together cornmeal, flour, baking powder, baking soda, salt, and brown sugar.
7. In a medium bowl, whisk together 2 TBSPs of remaining butter (saving the 1 last TBSP) oil, eggs, milk, and Greek yogurt. Stir in corn.
8. Fold wet ingredients into the cornmeal mixture until all dry ingredients are incorporated.
9. Remove jalapeños from liquid in pan. Set aside 8 or so slices for garnish on the top. Chop the rest and lightly fold 1/3 cup into the batter along with the cheese. 
10. Spread cornbread batter in prepared pan. Pour remaining 1 TBSP of butter over the top of the batter. Use a brush or the back side of a spoon to spread the butter evenly over the batter. Place remaining candied jalapeño slices on top of batter.
11. Bake for 30-35 minutes or until golden brown and a toothpick poked in the middle comes out clean.
12. Slice and serve warm with chili. 


Tuesday, May 11, 2021

Baked Potato

 My daughter will be going to college this fall. I'm hoping she'll use my blog as a reference as she learns to make meals for herself, hence the basic recipe post. This makes a nice fluffy potato with a crispy skin. We like to eat it with this Broccoli Cheese Soup on top as a sauce, and even with some BBQ Chicken. 

Baked Potato
1 russet potato
1 tsp olive or vegetable oil
Salt and Pepper 

Toppings: butter, sour cream, bacon, chives, scallions, cheese, salsa, chili.

1. Preheat oven to 400 degrees.
2. Scrub the potato with water and a vegetable brush until well-cleaned. Blot dry with a kitchen towel or paper towel.
3. Rub the entire potato with oil, then sprinkle on a little salt and pepper and rub that in too.
4. Prick potato with a fork three or four times. This will allow the steam to escape while baking.
5. Place potatoes directly on the oven rack. Bake until potatoes just begin to appear wrinkly and papery on the outside, and when you squeeze the potato, it gives - 40-50 minutes, depending on the size of your potato. Test for doneness by sticking a fork into the potato (it's done if the fork goes in easily).
6. Remove from the oven and, as soon as you can handle them, slice each potato down the middle. Then place your forefinger and thumbs on the bottom ends and squeeze toward the center. This helps to fluff the insides, and helps keep moisture from getting trapped inside the skin as the potatoes begin to cool.


3 Layer Chocolate Cake with Peanut Butter Frosting

This is the chocolate cake I like to make when my kids request it for their birthdays. It's the Hershery's recipe but for 3 layers instead of 2. My 13yo has some variation of a peanut butter and chocolate every year for his birthday! This was my first time trying this frosting and ganache drip and I love how it turned out. I fancied it up with a bunch of PB candy and cookies on the top.

3 Layer Chocolate Cake with Peanut Butter Frosting
adapted from Hershey's Perfectly Chocolate Cake
Cake
3 cups sugar 
2 3/4 cups + 1 TBSP flour 
1 cup + 2 TBSPs unsweetened cocoa powder 
2 1/4 tsp baking powder 
2 1/4 tsp baking soda 
1 1/2 tsp salt 
3 large eggs 
1 1/2 cups buttermilk 
3/4 cup canola oil 
3 tsps vanilla extract 
1 1/2 cup boiling water

1. Heat oven to 350°F. Grease and flour three 9-inch round baking pans.
2. Stir together sugar, flour, cocoa, baking powder, baking soda and salt in large bowl. 
3. Add eggs, milk, oil and vanilla; beat on medium speed of mixer 2 minutes. 
4. Stir in boiling water (batter will be thin). Pour batter into prepared pans.
5. Bake 30 to 35 minutes

Peanut Butter Frosting
adapted from sugarspunrun.com
1 1/2 cups butter softened to room temperature 
1 1/2 cups creamy peanut butter 
4 1/2 cups powdered sugar 
1 1/2 tsps vanilla extract 
3/4 tsp salt 3 TBSPs milk

1. Combine butter and peanut butter in a large bowl and use an electric mixer to beat until creamy and well-combined.  
2. Gradually (about 2 cup at a time), with mixer on low speed add powdered sugar until completely combined. Be sure to scrape the sides and bottom of the bowl so all ingredients are well-combined. 
3. Mix in vanilla extract and salt.
4. With mixer on low-speed, add milk and stir until well-combined. Gradually increase speed to high and beat for 30 seconds.  
5. Spread or pipe frosting onto completely cooled cake.

Chocolate Ganache Drip (optional)
adapted from loveandsugar.com
6 oz (1 cup) semi sweet chocolate chips
1/2 cup heavy whipping cream

1. Add the chocolate chips to a medium sized bowl and set aside.
2. Add the heavy whipping cream to a microwave safe bowl or measuring cup and heat for about 1 minute, keeping an eye on it. Remove from the microwave just before it bubbles up.
3. Pour the warm cream over the chocolate chips and allow to sit for 3-5 minutes. You can cover the bowl with some clear wrap to trap in the heat, if you like.
4. Gently stir the cream and chocolate together until they come together to a smooth consistency. Try not to whisk too vigorously, which can add air bubbles to the ganache.
5. Allow ganache to cool for about 10 minutes.
6. Using a squeeze bottle or a spoon make drips around the top edge of the cake. Spread rest of ganache on the top of the cake.

Garnish with all kinds of PB treats!


Sunday, March 28, 2021

Slow Cooker French Dip Sandwiches

I saw this recipe on Instagram and it looked delicious, so I added it to my menu plan last week. It did not disappoint. I made a couple changes to how I cooked it, which I noted at the bottom. I'm already looking forward to eating this again!
Slow Cooker French Dip Sandwiches
3 pound tri tip steak
1/2 cup soy sauce
1 15 oz can beef broth
1 bay leaf
1/2 tsp black pepper
1 tsp dried rosemary
1 tsp dried thyme
1 tsp garlic powder
Hoagie Rolls
Cheese slices

1. Remove and discard the fat from the roast. Place the trimmed roast in a crockpot on low.
2. In a medium bowl, combine soy sauce, beef broth, bay leaf, pepper, rosemary, thyme, and garlic powder. Pour mixture over the roast. Cover, and cook on low heat for 8 hours.
3. Take the meat out and shred it, then let it cook 1-2 hours more, or until meat is very tender.
4. Remove meat from broth, reserving the broth.
5. Distribute the meat on hoagies and top with cheese. Place under a broiler until the cheese is melted and the bread is toasted. Use reserved broth for dipping.

Notes: I used water and beef bouillon instead of broth. I cooked the roast on high for 5 hours, shredded, then cooked on low for 2 more and it was great. After removing the meat from the slow cooker, I chopped it up a little so that it wouldn't be stringy. I used gouda cheese slices in the picture. It made enough for 10 sandwiches with a little left over. I tried some leftover meat in a tortilla with queso fresco, salsa, lettuce, tomato, avocado, and lime and it was really good!

Wednesday, February 10, 2021

Zuppa Toscana

I grew kale in my garden this year for the first time. This sent me on the hunt for some kale recipes. I found this Olive Garden copycat Zuppa Toscana aka Tuscan Soup, and had heard of before but never tried it. I used spicy sausage and left the peel on the potatoes. My entire family enjoyed this soup, which means it gets added to the blog. With some focaccia bread on the side, mmmmm!!!

Zuppa Toscana
1 pound spicy or mild Italian ground sausage
4 TBSPs butter 
1/2 white onion, diced
1 TBSP minced garlic
6 cups chicken broth
2 cups water
4/5 yellow potatoes, washed and cut into 1-inch pieces
2 tsps salt or to taste
1 tsp black pepper
2 cups heavy cream
4 cups chopped kale
Chopped bacon and grated parmesan cheese for topping, optional

1. In a large pot, sauté sausage 5-6 minutes until browned. Use a slotted spoon to transfer sausage to a plate and set aside. Remove any grease that is left.
2. In the same pot, add butter and sauté onions over medium heat until translucent. Add garlic and sauté for another minute until fragrant. Add chicken broth, water, potatoes, salt, and pepper and bring to a boil.
3. Boil until potatoes are tender, check with a fork at about 10 minutes. Stir in kale and heavy cream. Add sausage. If you want to remove some of the grease, see my note at the bottom. Taste and add salt and pepper if needed. Serve garnished with bacon and grated parmesan cheese if desired. 

Note: Sausage is greasy and the spicy variety leaves an orange layer that hangs out at the top of the soup. I removed some of this fat with a gravy separator. I scooped the top layer as best as I could with a ladle, poured it into my gravy separator, and let it sit for a few minutes to let the grease rise to the top. Then poured the liquid back in. I added a picture of it below.

Another note: When recipes call for chicken broth, I usually substitute water and chicken bullion which works well in this soup.


Monday, December 28, 2020

Chocolate Yule Log with Mascarpone Cream Filling and Peppermint Meringue Mushrooms

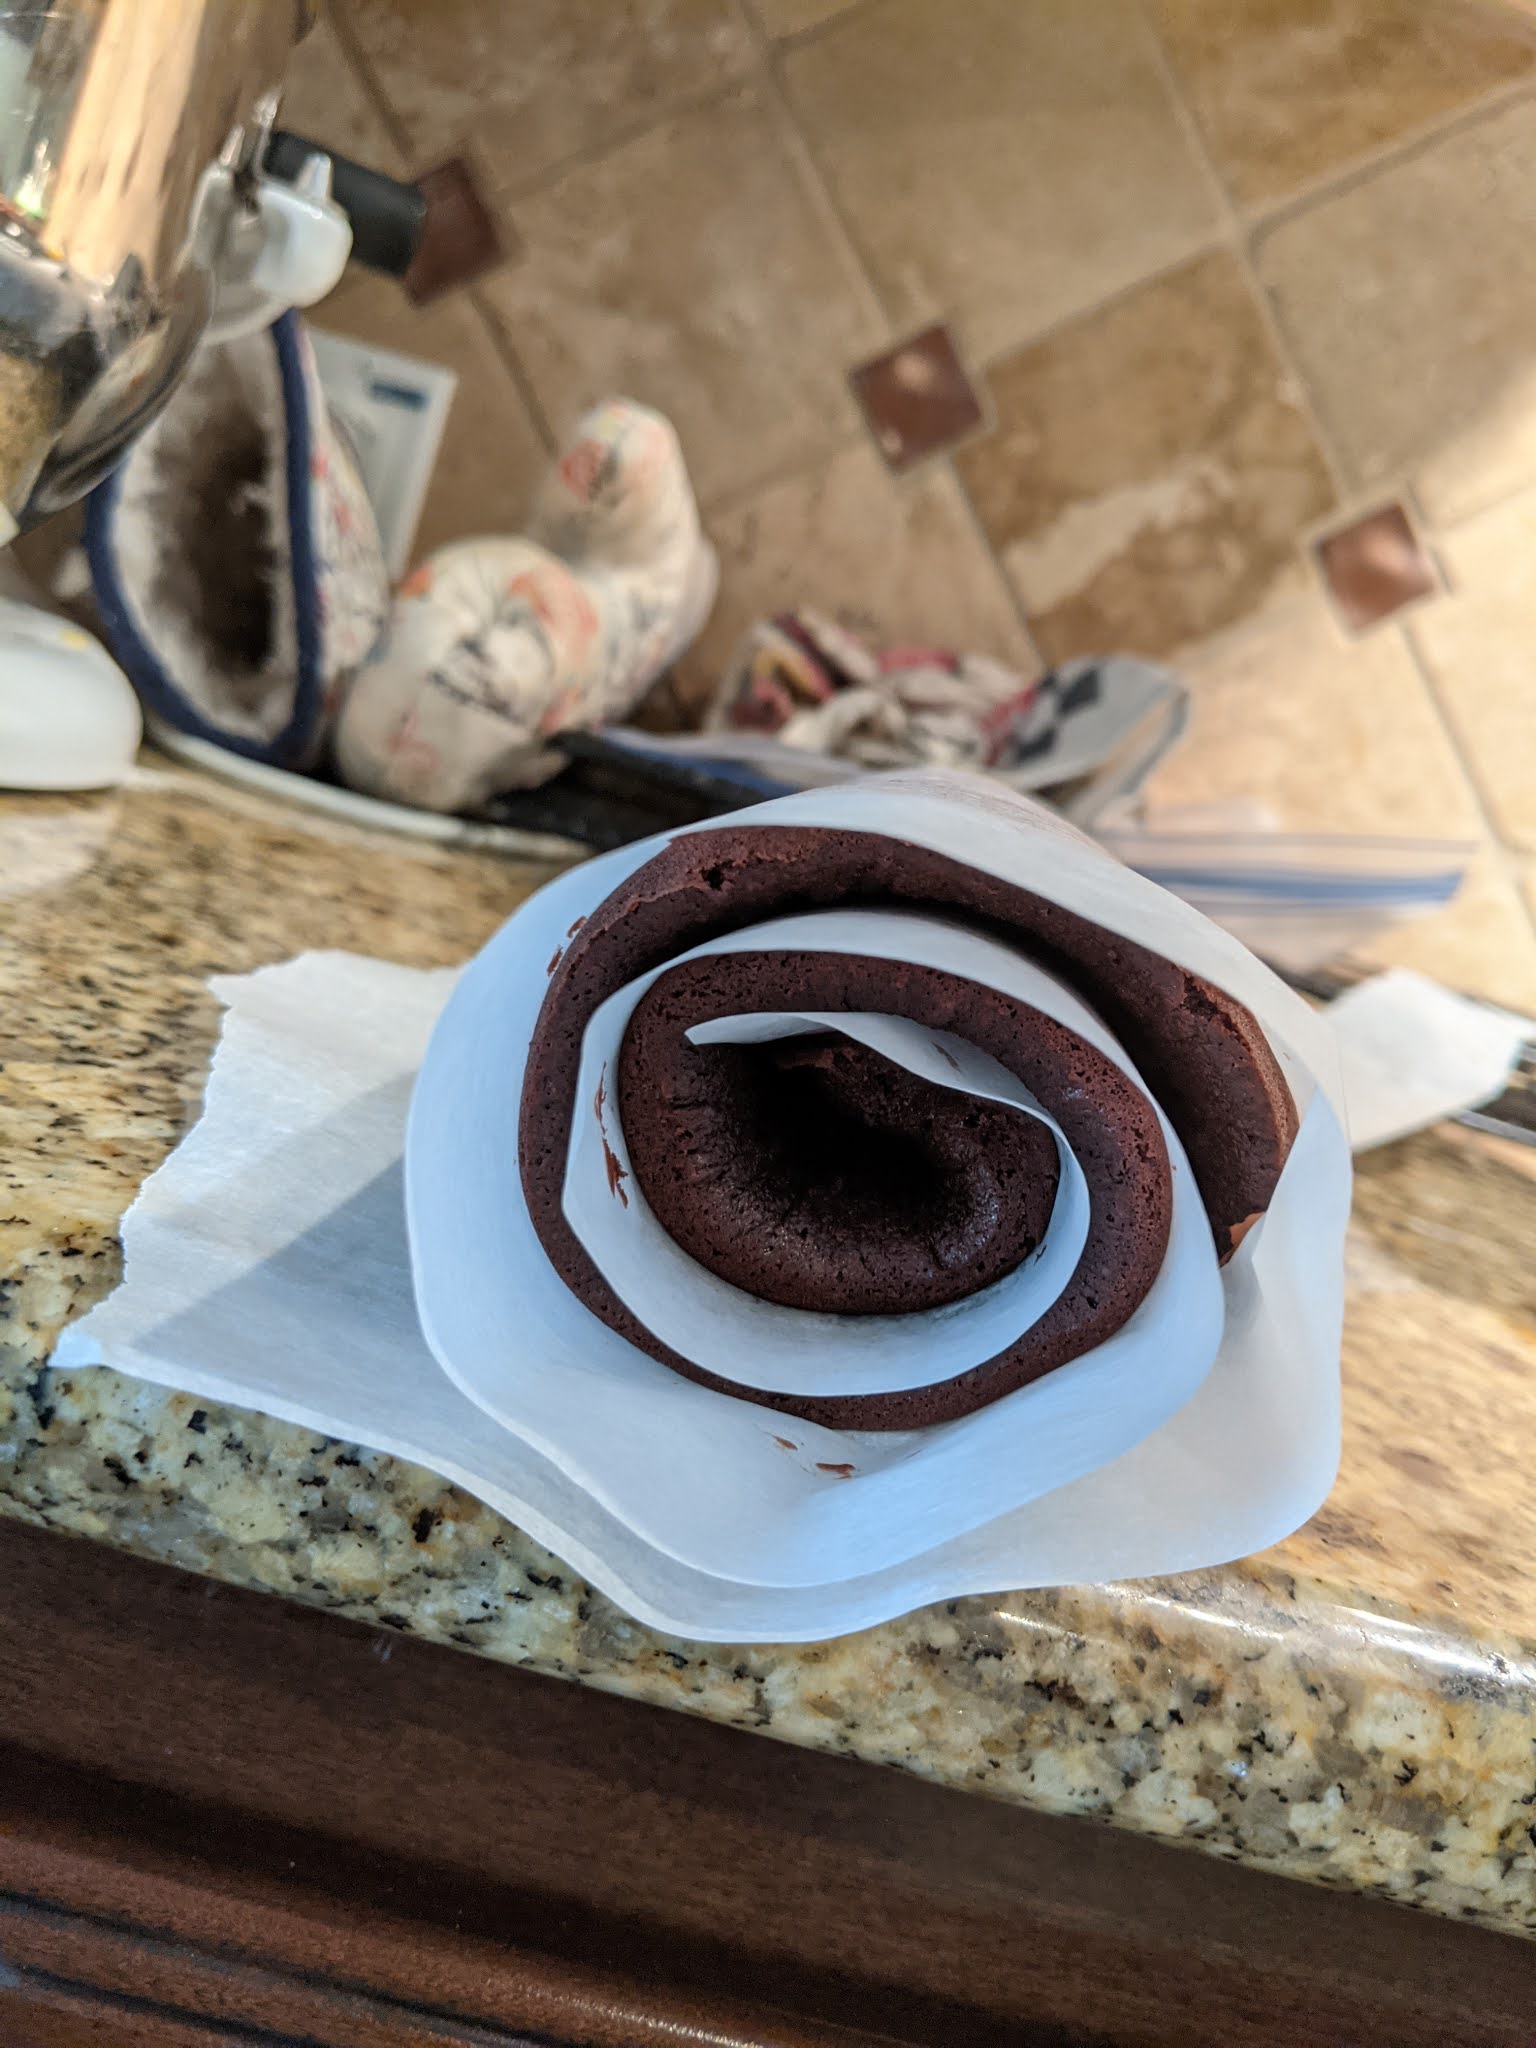
 This year was just the worst. I decided the worst year deserved a special dessert to follow Christmas dinner, so I made my first ever Yule log aka bûche de Noël. A Yule log is a thin sponge cake rolled up with a cream filling and decorated to look like an actual log. I based my creation on a couple different recipes, and have combined them here just in case I endeavor to make this again or even turn it into a yearly tradition. I made this over 2 a day period. The first day I made the cake and filling, rolled it up, covered it, and refrigerated it overnight. I also started the cranberry and rosemary garnish. The next day I made the frosting and mushrooms, finished the garnish, and assembled everything. It's quite a time consuming dessert, and I had a few little helpers which was nice. I absolutely love how it turned out. It might be the most beautiful dessert I've ever made. See a few helpful notes and more pictures following the recipe. 


Chocolate Yule Log with Mascarpone Cream Filling and Peppermint Meringue Mushrooms
Cake
3/4 cup all-purpose flour
1/3 cup Hershey’s Special Dark cocoa powder
1 tsp baking powder
1/2 tsp salt
4 large eggs, separated
3/4 cup granulated sugar
5 TBSPs sour cream
1/4 cup butter, melted
1 tsp vanilla extract

Filling
1 1/4 cups heavy whipping cream, cold
3/4 cups powdered sugar
1 tsp vanilla extract
1/8 tsp salt
8 oz mascarpone cheese, softened, but still chilled

Frosting
1 cup heavy whipping cream
1 cup semi sweet chocolate chips
1/2 - 3/4 cup powdered sugar

Meringue Mushrooms (Optional)
3 large egg whites
1/4 tsp cream of tartar
1/4 tsp salt
1/2 tsp peppermint extract
1 cup granulated sugar
1 TBSP unsweetened cocoa powder
4 ounces chocolate chips

Sugared Cranberries and Rosemary (Optional)
1/2 cup water
1 cup sugar, divided
1/2 cup fresh cranberries
4-5 sprigs rosemary

Cake - 
1. Preheat oven to 350°F. Line a 17×12 inch jelly roll sheet pan with parchment paper. Make sure the parchment paper sticks up at least an inch above the sides of the pan on all sides. You’ll use the parchment paper later to lift the cake out of the pan and roll it up.
2. Whisk the flour, cocoa, baking powder and salt together in a medium bowl and set aside. 
3. In a large bowl, combine the egg yolks and sugar and whisk together until well combined. Add the sour cream, melted butter and vanilla extract and whisk together until well combined.
4. Add the dry ingredients and gently whisk together until well combined, then set aside.
5. Add the egg whites to a large mixer bowl and whip on high speed until stiff peaks form.
6. Gently fold about 1/3 of the whipped egg whites into the chocolate mixture to loosen up the batter. Add the remaining egg whites and gently fold together until well combined.
7. Spread the cake batter evenly into the prepared pan and bake for 10-12 minutes, or until the top of the cake springs back when toughed and a toothpick inserted comes out clean.
8. Remove the cake from the oven and immediately lift the cake out of the pan using the parchment paper and place it on the counter.
9. While the cake is hot, use the parchment paper the cake was baked in and start at the shorter end of the cake to slowly roll the cake up. Set the cake aside to cool completely.

Filling - 
1. When the cake has cooled and is ready to be filled, make the filling. Add the heavy whipping cream, powdered sugar, vanilla extract and salt to a large mixer bowl and whip on high speed until soft peaks form.
2. Add the mascarpone cheese to the whipped cream and whip until stiff peaks form. It will happen fairly quickly.
3. Unroll the cake roll very carefully, looking out for areas where it may be sticking to release it. You can use an offset spatula or something similar and run it along the parchment paper as you unroll the cake to help release it as it unrolls.
4. Spread the filling evenly onto the unrolled cake, then roll it back up without the parchment paper. Wrap it up in plastic wrap with the seam side down and refrigerate for at least an hour to firm up or overnight. 

Sugared Cranberries and Rosemary -
1. Place cranberries and rosemary in small separate bowls; set aside.
2. In a medium saucepan, bring the water and 1/2 cup of sugar and to a boil. Reduce heat and simmer for 5 minutes until the sugar has dissolved.
3. Remove pan from the heat and allow to cool for 5 minutes. 
4. Pour sugar syrup over the cranberries and rosemary, dividing it evenly between bowls. Cover the bowls and refrigerate for 6 hours or overnight.
5. Drain the cranberries and rosemary from the syrup. Place the cranberries and rosemary in a large zip lock bag and add 1 cup of sugar to the bag. Toss to coat.
6. Pour the sugared cranberries and rosemary out onto a parchment lined baking sheet and let them dry for at least 2 hours at room temperature or in the refrigerator.

Frosting -
1. To make the frosting, in a small saucepan, bring whipping cream to a simmer over medium-low heat. Add chocolate chips. Do not stir.
2. Remove from heat and let sit for 15 minutes. After 15 minutes, stir until smooth.
3. Refrigerate for 30 min.
4. Transfer to a medium sized mixer bowl. Stir in 1/2 cup of powdered sugar.
5. Mix on high speed until thick enough to spread adding an extra 1/4 cup of powdered sugar if needed.
6. To decorate the cake, use a large serrated knife to gently cut off a piece of the log about 3-4 inches in length. Make the cut with a slight diagonal. Arrange logs pieces on a platter or cake stand.
7. Use some of the frosting to attach the small log to the side of the larger log.
8. Spread the remaining frosting to cover the cake.
9. Using a fork, create bark-like lines by dragging the fork from one end of the cake to the other, wiping off the extra frosting that builds up on the fork.
10. Place in refrigerator uncovered to set frosting while making meringues.

Meringues - 
1. Preheat the oven to 225°F. Line 2 cookie sheets with parchment paper.
2. In a bowl, use an electric mixer to whip egg whites until foamy. Add cream of tartar, salt, and peppermint. Continue whipping until the whites hold soft peaks.
3. Gradually sprinkle in the sugar so that it does not sink to the bottom, and continue whipping until the mixture holds stiff shiny peaks.
4. Place a round tip (I used size 2A) into a pastry bag, and fill the bag half way with the meringue. To pipe the mushroom caps, squeeze out round mounds of meringue onto one of the prepared cookie sheets. Pull the bag off to the side to avoid making peaks on the top. For the stems, press out a tiny bit of meringue onto the other sheet, then pull the bag straight up. They should resemble candy kisses.
5. Dust the mushroom caps lightly with cocoa using a small sifter or strainer. 
6. Bake for 1 hour in the preheated oven, or until the caps are dry enough to easily remove from the cookie sheets. Set aside to cool completely.
7. Melt the chocolate chips in a small bowl in the microwave at half power, stirring occasionally until smooth.
8. Poke a small hole in the bottom of a mushroom cap. Spread chocolate over the bottom of the cap. Dip the tip of a stem in chocolate, and press lightly into the hole. When the chocolate sets, they will hold together. Repeat with remaining pieces. Store at room temperature covered and in a dry place until ready to decorate.
 
Decorate with mushrooms, sugared cranberries and rosemary, if desired. I even threw on a little of the extra sugar to look like snow and sprinkled some on the top. I also added some tiny pine cones. Go wild. 
Refrigerate the cake until ready to serve. 

A few notes:
1. I definitely recommend making this over a 2 day period and eating it the 2nd day. I wrote my steps in the order that I did things. Cake, filling, and start sugared cranberries and rosemary the first day. Frosting, meringues, and finish sugared cranberries and rosemary the second day. 
2. When I originally made this, I followed a recipe where the cranberries and rosemary sat overnight together in a bowl. This made the cranberries taste like rosemary, so if you want to eat the sugared cranberries, you should separate them from the rosemary (which I changed in this recipe) if not, then you can combine them in one bowl.
3. I changed the original meringue recipe from vanilla to peppermint. If you prefer vanilla meringue, use 1 tsp of vanilla extract instead of 1/2 tsp of peppermint.
4. After cutting the piece of the diagonal piece off of the log, I also cut a small slice off the other end of the large part of the log to make it look nice at both ends.


Wednesday, October 28, 2020

Pigs in a Blanket 2.0

 I found a new favorite crescent roll recipe 2 years ago and it's now the roll recipe I use to make pigs in a blanket. The dough is SO easy to work with and rolls out really nicely. I make these a few times a year, and sometimes do a double batch which makes 72 pigs! My kids love them for lunches at home and at school. 

Pigs in a Blanket 2.0
1 TBSP instant yeast
¼ cup warm water
½ tsp sugar
1 cup warm milk
½ cup vegetable oil
½ cup sugar
1 tsp salt
1 cup flour
2 eggs
3-4 cups flour
1 (14oz.) package Lit'l Smokies sausages
 

1. In a 1 cup glass measuring cup, mix yeast with warm water and ½ tsp sugar. Let stand until bubbly.
2. In a large bowl whisk together warm milk, oil, ½ cup sugar, and salt. Add 1 cup of flour to mixture, and mix well. Add 2 eggs and mix vigorously by hand. Add yeast mixture and mix vigorously until smooth (I like to use my whisk again here). With a wooden spoon, stir in 3-4 cups flour to the yeast mixture ( I usually end up doing 3 1/2 cups). Dough should be sticky.
3. Pour the dough into a large bowl. Cover with a tea towel or plastic wrap and let rise in a warm place for 1-2 hours until it has doubled in size.
4. Once the dough has doubled in size, punch down and divide into thirds (each of my thirds weighs about 14.5 ounces). Roll 1/3 of dough on a floured surface making a circle about 12 inches round. Dough should be about ⅜" thick. Cut into 12 triangles (like a pizza). Place a sausage at the wide end of each triangle. Roll from the wide end to the point. Place rolls onto a lined or greased cookie sheet (I do 3 across and 6 rows down). Repeat with the other 2 thirds of dough. You should end up with 36 rolls, 2 pans with 18 on each. Cover rolls with a tea towel or plastic wrap and let rise for another hour at room temperature or until the rolls double in size. 
5. Bake at 375 degrees until light lightly browned, which is about 15 minutes. Remove from oven and brush with melted butter.


Monday, October 5, 2020

Sticky Cinnamon-Sugar Monkey Bread

 My daughter works at a sandwich shop and some nights she brings home extra bread dough. This is one of the things I like to make with that dough. It's super easy and yummy. The recipe calls for 2 pounds of frozen dough. Rhodes Bake n Serve White Bread dough works well for this. I have tried it with vanilla and butterscotch pudding and they are both great. This picture is with the butterscotch pudding. 


Sticky Cinnamon-Sugar Monkey Bread
2 loaves (1 pound each) frozen bread dough, thawed 
1 cup packed brown sugar
3/4 cup butter, cubed
1 package (3 oz) cook and serve vanilla or butterscotch pudding mix
2 TBSPs milk
2 tsps ground cinnamon

1. Cut dough into 1-inch pieces; place in a greased 13x9 inch baking dish.
2. In a large saucepan, combine remaining ingredients; bring to a boil. Cook and stir 1 minute; remove from heat. Pour over dough pieces.
3. Cover loosely with parchment or nonstick foil. Let rise in a warm place until almost doubled, about 45 minutes.
4. Preheat oven to 350°. Bake uncovered 20-25 minutes, until golden brown . Immediately invert onto a serving plate.
Serves 16


Wednesday, September 30, 2020

Best Pumpkin Bread

I decided I wanted to try a new pumpkin bread recipe, but I didn't have to make a bunch of different loaves to find the best one, because there's a blogger that already does that! I read The Pancake Princess's pumpkin bread bake-off post and baked her winner. It comes from seriouseats.com and apparently is the pumpkin bread recipe for the San Francisco bakery Tartine and is actually called Pumpkin Tea Cake. It has great spice flavor and a fun crispy sugary crust on top. If you like chocolate chips in your pumpkin bread, don't be afraid to throw some in!

Best Pumpkin Bread
seriouseats.com
1 2/3 cups all-purpose flour
1 1/2 tsps baking powder
1/2 tsp baking soda
1 TBSP + 2 tsps ground cinnamon
2 tsps freshly grated nutmeg
1/4 tsp ground cloves
1 cup + 2 TBSPs pumpkin or squash puree (canned or homemade)
1 cup vegetable oil
1 1/3 cups sugar
3/4 tsp salt
3 large eggs
2 TBSPs sugar for topping
2 TBSPs pepitas (optional but highly recommended)

1. Preheat the oven to 325°F. Lightly butter the bottom and sides of a 9x5 inch loaf pan.
2. Sift or whisk together the flour, baking powder, baking soda, cinnamon, nutmeg, and cloves.
3. In another bowl, beat together the pumpkin puree, oil, sugar, and salt on medium speed until well mixed. Add the eggs one at a time, mixing well after each addition. Scrape down the sides of the bowl. On low speed, add the flour mixture and beat until just combined. Scrape down the sides again, then beat on medium speed for 5 to 10 seconds to make a smooth batter. The batter should have the consistency of a thick purée. Make sure not to overmix, or you will end up with a coarse, tough crumb.
4. Transfer the batter to the prepared loaf pan. Sprinkle the top evenly with half the topping sugar, then the optional pepitas, and then the rest of the topping sugar. Bake until a tester emerges clean from the center, about 1 hour
5. Let cool in the pan on a wire rack for about 20 minutes. Then invert the cake onto the rack, turn right side up, and let cool completely. Serve at room temperature. The cake will keep, well wrapped, at room temperature for 4 days or in the refrigerator for about 1 week.

Monday, August 17, 2020

Rustic Strawberry and Peach Galette

 Summer is almost over, but there's still time for summer desserts! You only need a few ingredients for this recipe. It's pretty much like a pie but an easier version with less filling. You can substitute other fruit like blackberries or blueberries and make your own creation. We like it with a scoop of vanilla ice cream!

Rustic Strawberry and Peach Galette
1 pie crust (store bought or my recipe here)
2 cups sliced fresh strawberries
2 fresh ripe peaches, peeled, pitted and sliced
2 TBSPs sugar
1 tsp vanilla extract
1 egg beaten

1. Mix the peaches and strawberries together in a medium bowl. Add the sugar and vanilla, tossing well to coat the fruit. Set aside and allow the mixture to soak as you roll out the crust.
2. Preheat oven to 425°F (190°C). Line a large baking sheet with parchment paper or a silicone baking mat. Set aside.
3. On a lightly floured surface, roll the pie dough into a 12-inch circle. Trim the rim of the circle to make a clean cut if desired. Transfer dough to the prepared baking sheet.
4. Spoon the fruit (not the juices) into the center of the dough, leaving a 2-3 inch border all around.
5. Gently fold the edges of the dough over the fruit, overlapping the dough as necessary. Press gently to seal the edges. Pour most of the reserved juices over the fruit, leaving about 1-2 TBSPs behind. Too much juice and the dough will become soggy. Brush the crust with the beaten egg and sprinkle with sugar.
6. Bake for 25-35 minutes or until the crust is golden brown, Remove from the oven and allow to slightly cool before serving. Serve warm or at room temperature. Tart tastes best on the same day it is baked. Cover and store in the refrigerator for up to 3 days.


Friday, August 14, 2020

Focaccia

 During the first days of quarantine, I was obsessively watching bake-along videos on Instagram. One of the Instagram accounts that I have diligently watched is Bread Ahead. They are a London Bakery and are famous for their doughnuts. I visited the bakery a few years ago and had one of those delicious doughnuts. I learned how to make them in a Zoom class recently too! The owner Matthew demonstrates how to make many of the items they sell in their shop on his Instagram account. I saved all the videos and have made quite a few of the recipes. One of the recipes I tried and fell in love with was the Focaccia. I have a great big rosemary plant in my garden and it's fun to snip some off for this bread. The recipe is special because it's a no-knead version. Instead of kneading, you fold the dough. Matthew shows his special folding technique on Instagram. I tried to describe it in words in the recipe, but I recommend watching him. Here is the link to Bread Ahead's original recipe and video on Instagram. The main change I made is that I use instant yeast instead of fresh yeast (you can't really find fresh here in the grocery store) and because I changed it to dry, the initial rise time is a little longer. I have also converted the recipe to standard American measurements.

Focaccia
adapted from Bread Ahead Bakery
4 1/2 cups flour
1 tsp dry instant yeast
2 1/4 cups warm water
2 tsps salt
1/4 cup olive oil, divided
Rosemary, washed and stems removed
Sea Salt

1. Measure out water into a medium sized bowl. Sprinkle yeast on top. Let it sit for a couple minutes to hydrate, then stir together. Set aside.
2. In a large bowl, add salt and flour. Stir together. Make a well in the center and add water and yeast mixture. Stir to combine scraping down the sides of the bowl. Mix well until dough comes together.
3. Pour 2 TBSPs of olive oil around the edge of the dough where it meets the sides of the bowl. Scrape sides down so the the oil gets under the dough.
4. Prepare an area to dump out and fold dough with a little bit of olive oil so it doesn't stick. Dump dough into the surface. Maneuver dough into a square with your fingers (about 10 inches across). This is where we fold (FOLD #1). Watch this fold in action in the video link above at about 15:30 in. Grab one end of the dough and fold it across about 2/3 of the way over. Then grab the other end (straight across from the first end you grabbed) and pull it up and over toward the other side. Now you have a skinny rectangle. Take the skinny end and repeat the same fold (2/3 of the way over, then take the last side and and pull it over. Carefully flip the dough over and slide it back into the bowl. Cover and leave at room temperature for 1 hour.
6. After 1 hour, carefully slide the dough onto your prepared folding surface and repeat the above folding process (FOLD #2). Slide back into bowl. Cover and leave a room temp to rise for 30 minutes.
7. After the 30 minutes is up, repeat folding process (FOLD #3). Cover and leave on counter for another 20-30 minutes as you prepare for the next steps.
8. Preheat the oven to 450 degrees. Line a baking sheet with parchment paper. Sprinkle a little flour or corn meal on the baking sheet. Slide dough onto baking sheet. Pull the sides a little to stretch out.
9. Drizzle about 1 TBSP of olive oil on top. Poke holes into the dough with your fingertips stretching dough out a little as you poke the holes. Stick small pieces of rosemary on top. Drizzle with another 1 TBSP of olive oil.
10. If you have a spray bottle, spray the top of the dough lightly with water (this will help to form a crust) and sprinkle with sea salt.
11. Bake for 17 minutes or until top is lightly browned.

Makes one loaf

For 2 smaller round loaves: In step 8, line two 8-inch round pans with parchment paper instead of using a baking sheet. Cut dough in half and slide one half of the dough into each pan. Follow other directions as stated. Drizzle 1/2 TBSP of oil on each loaf, and decorate with rosemary (add cherry tomato slices for Christmas design). Bake as directed above for 15-17min, checking at 15 min.


Smaller Christmas Loaves


For 2 round loaves: In step 8, line two 8-inch round pans with parchment paper instead of using a baking sheet. Cut dough in half and slide one half of dough into each pan.